Showing posts with label 99 Miata-The Turtle. Show all posts

Saturday, November 26, 2016

Looking For Surfboards...In Texas

Ow....That's Gonna Smart

 I installed a Blackbird Fabworx Single Diagonal Rollbar in the car a few months back to get the car ready for track days and also as a added safety feature on the street.  

One thing I noticed about this roll bar was that it comes really close to my head, with the NB1 seat in a comfortable driving position.  I now see why the Hard Dog Single Diagonal roll bar has the diagonal brace offset slightly,  to allow the driver some extra head room.

I don't regret buying the Blackbird bar, but I think that for a mostly street driven car, the Hard Dog might have been a better choice. 

I have the bar padded with SFI approved padding, but the thought of hitting the bar with my oversized noggin, just wasn't that appealing to me.  Unfortunately this is a real possibility with the shorter NB1 seats. Since I primarily plan to drive the car on the street, I wasn't really interested in installing a set of aftermarket seats at this time.

So, I hit up Car-Part and started searching for a set of NB2 "Surfboard"seats.

Surfboards?

The factory seats used in the 2001-2005 Miata/MX-5 cars, had a much taller seatback and headrest than the earlier seats.  They look kind of like a surfboard, so that's the name that stuck for them.    It's a popular upgrade for earlier model NB1 cars (like mine) and NA Miatas as well.  I've been keeping my eye out for a set locally, but haven't had much luck.  I thought using Car-Part.com might net me a set locally, or at the very least, in Kansas City.

Foiled Again!

Surprise, surprise.  There's not a very big supply of used Miata parts in this area.  A search in the Kansas/Missouri/Arkansas area didn't show a lot of promise, unlike my search for the same parts in Texas. Plenty of hits there.  Go figure.  I figured it was a good excuse to go see my folks and snag some seats for the car.

Road Trip!

Mazda Heaven....Indeed

Stopped by Nissan-Mazda Heaven in Ft. Worth, TX to check out what they had, before I headed further south to my parent's place.

If you need ANYTHING Miata related in the TX/OK/KS area, this is the place to go to. They ship as well, so I have a feeling I'll be talking to these folks again.

   Found a set of blue cloth NB2 seats in "decent" shape. Definitely pricier than what I was used to paying for seats from a junkyard, but I needed them and they had them, so..yeah capitalism and stuff.  I also picked up a 2001+ Header and a spare gauge cluster for a possible future project.

"The Doorknob", Earning Its Keep

Time To Make The Chimichangas...

Got them home after spending the weekend with my folks and tore them down to properly clean the seat covers, and the foam.

Bought a plastic storage tub and filled it with water and some liquid upholstery cleaner from a spot carpet cleaner. Washed the covers by hand (gently) and then hung them to dry.

I'm glad I washed them, because the water was pretty filthy after I was done.

Wiped the seat foam down with some Clorox Spray Cleaner with bleach, and painted the seat pans with POR15.The pans got a little rusty while in the junk yard.   Rattle canned the pans with some semi gloss black to cover the POR15.

Battleship Grey

Did a slight "foamectomy" to both seat bottoms, before reassembling everything.

"Slight" Foamectomy

Seat Backs Reassembled


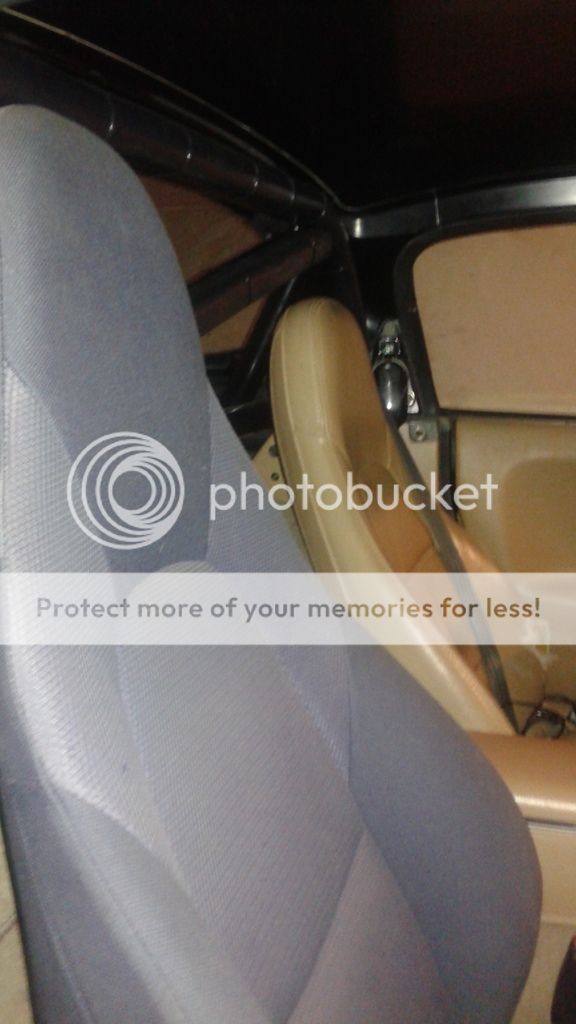
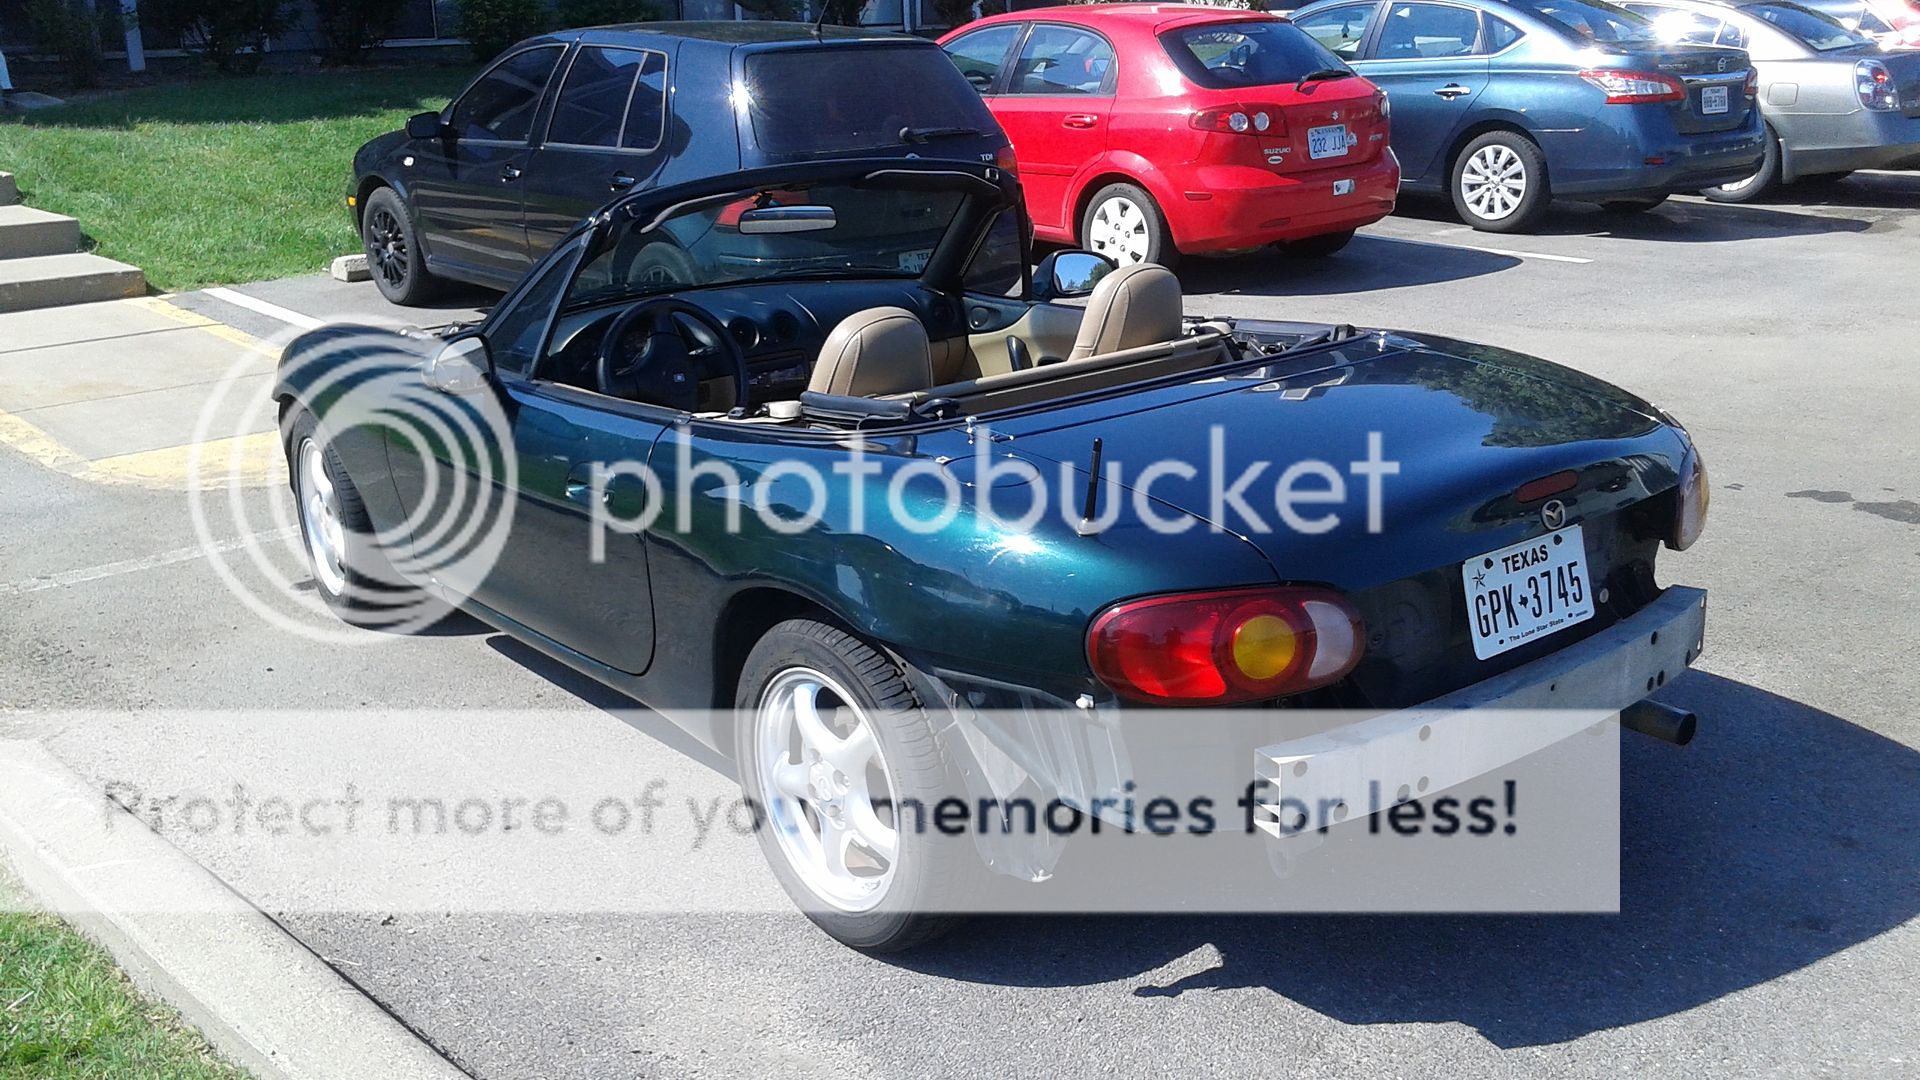
Reinstalled everything. From the first picture, you can see the difference in height between the NB1 and NB2 seats.

See What I Mean About The Rollbar?


Blue And Tan?  Yeah...No.


I went ahead and drove the car to work a few weeks ago and after spending some time in the new seats, I had to make a few adjustments.

Removed a section of rollbar padding directly behind the Driver's Side seat. It interfered with reclining the seat enough for it to be comfortable.

Reinstalled the foam section I cut out for the "foamectomy" on the Driver's Side. The angle that I was sitting at with the foam cut out, just wasn't that comfortable on long drives. I might take it back out and cut some more foam out to try and get it perfect, but I think I'll see how I like it for right now.

Need to order some aftermarket upholstery to change out the blue cloth for tan leather. I thought I wouldn't mind it that much.

 I was wrong.

I think the NB1 seats were a bit more comfortable than the NB2 seats, but I can't question the fact that the NB2 seats offer a lot more protection with the rollbar installed.  So, until I make a final decision about the "Surfboards", I'm going to hold onto the NB1 seats for awhile longer.

Who knows?  I may grow to like them.

Alpha, Mike, Foxtrot...

Track Weekend Bro!

Seemed Like A Good Idea... 

Took the Miata out to my first ever driving even on the weekend of the 15th and 16th of October.

Driver's Edge was holding an event at Motorsport Ranch in Cresson, TX and I took my all season tired, stock 170K suspension having butt out there to see what the car could do.

My plan was to drive the car down, beat it on the track and then drive home. No sweat, right?

I didn't go completely unprepared....I put new rotors and Green Stuff pads on all around. So I had that going for me.

See? That's me being prepared.

Seriously though, I went over the car as best I could.  Checked fluids, looked the car over on the underside, checked the suspension, made sure wheels were torqued, along with the brakes.

Heading Out..

This was going to be my first real road trip in the car, since I had gotten it, so just a bit nervous.

 I drove from Wichita KS, pretty much straight through to Plano, TX to meet a friend at the Mercedes dealership he worked at. We bullshitted a bit, and he threw a quickie alignment on the car for me, and then we headed out to Cresson, to check into the hotel for the night.

It's Too Early For This...

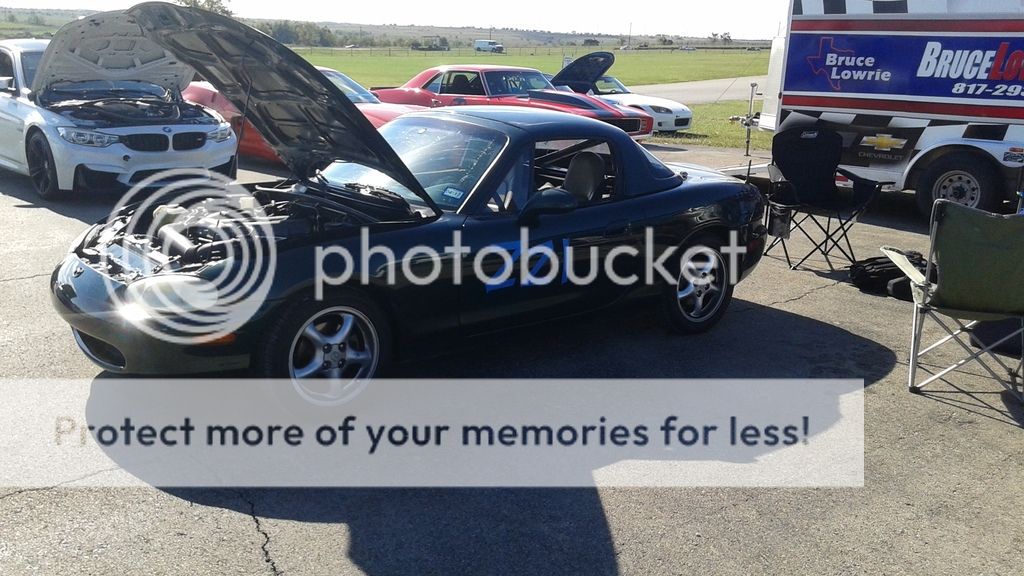
Got to the track as early as we could and staked out a spot for us and another friend who was driving his new M3. Once we got settled in to our spot, got checked in, attended my first driver's class and got the car ready for the day.

Nice Numbering Job, Eh?

Getting it "ready" consisted of slapping some numbers on it, emptying the trunk, adjusting the seat, doing a last minute fluids check and yanking the floor mats out.  Before too long, the call over the loud speakers came for the Green Group, and I was off to my first session with my instructor.

How Was It?

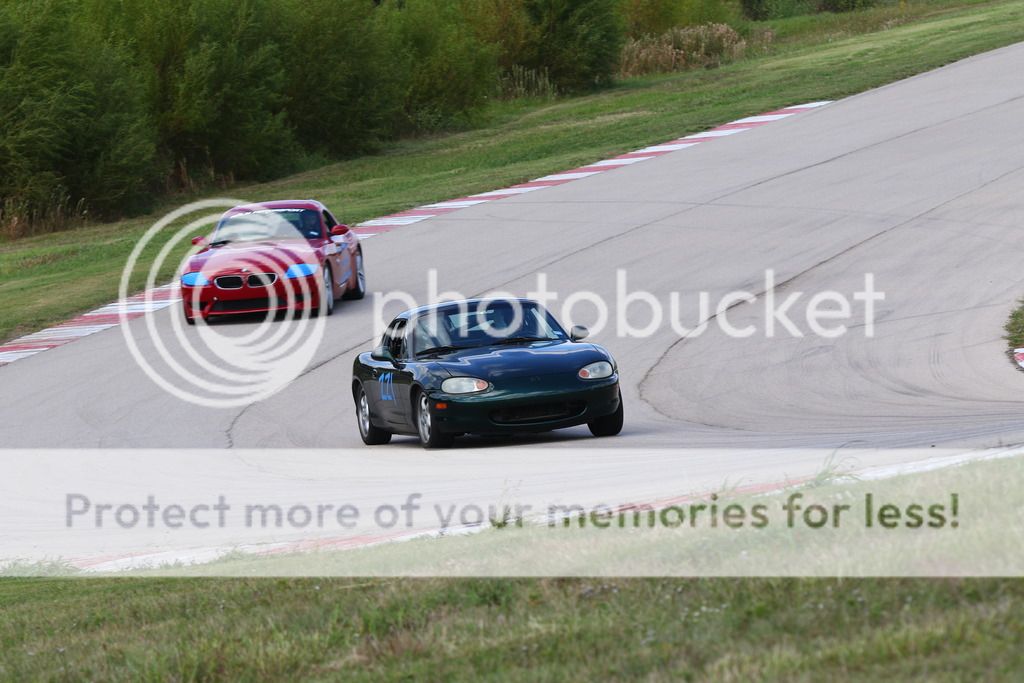
I had a blast! Definitely more intense than I was expecting At first I was very hesitant with the car, and definitely a bit stressed.  Lots of traffic out there, and a lot of information to process.  The track was set up for a full 3.1 mile course, so it was kind of a beating for my first ever track day. I got passed (a lot), but I enjoyed pushing the car once I relaxed a bit. Also the instruction I got from my instructor and the classroom sessions went a long way as well.

High Resolution Yo

Little Car, Big Track

Next Time...

I wanted to take the car out there mostly stock to see what it felt like before I started modding it with suspension parts, and different wheels and tires.

This is one tough little car.  I beat the dog snot out of the car, and it handled everything like a champ. Had a few close calls, but I didn't stuff it in the dirt.

Made the 6 hour drive back to Wichita on Sunday, without a real hitch, besides the one in my back.

Now, I really want to get some suspension and new wheels and tires for this thing.

Oh and improve the "loose nut" behind the wheel as well.


Alpha, Mike, Foxtrot....

The Turtle Gets Stripped

Just A Little Work...

  One thing that bothered me about the car when I got it was the condition of the front and rear bumpers.

The front was pitted and looked to have been repainted a few times, along with a small puncture mark on the driver's side.

The rear bumper wasn't that great either, with evidence of a few resprays and some cracked paint, showing down to the primer.

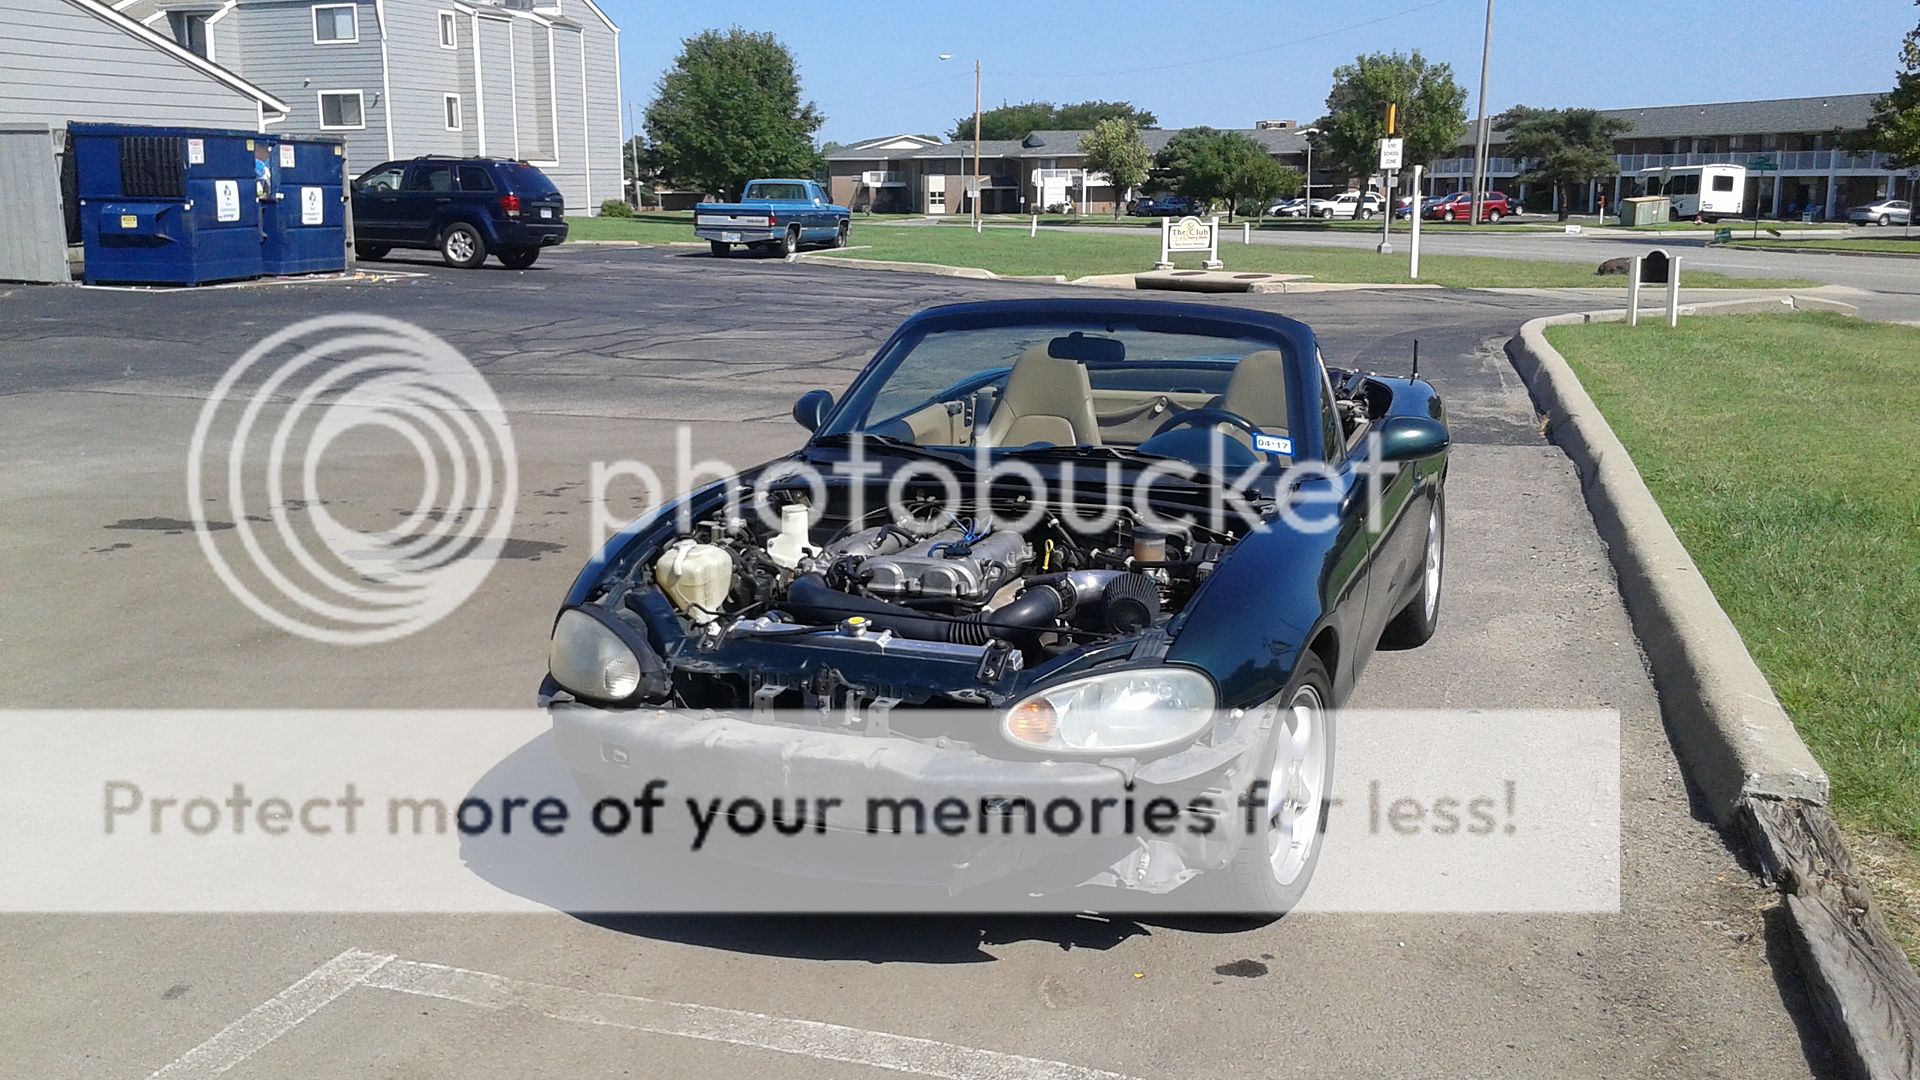
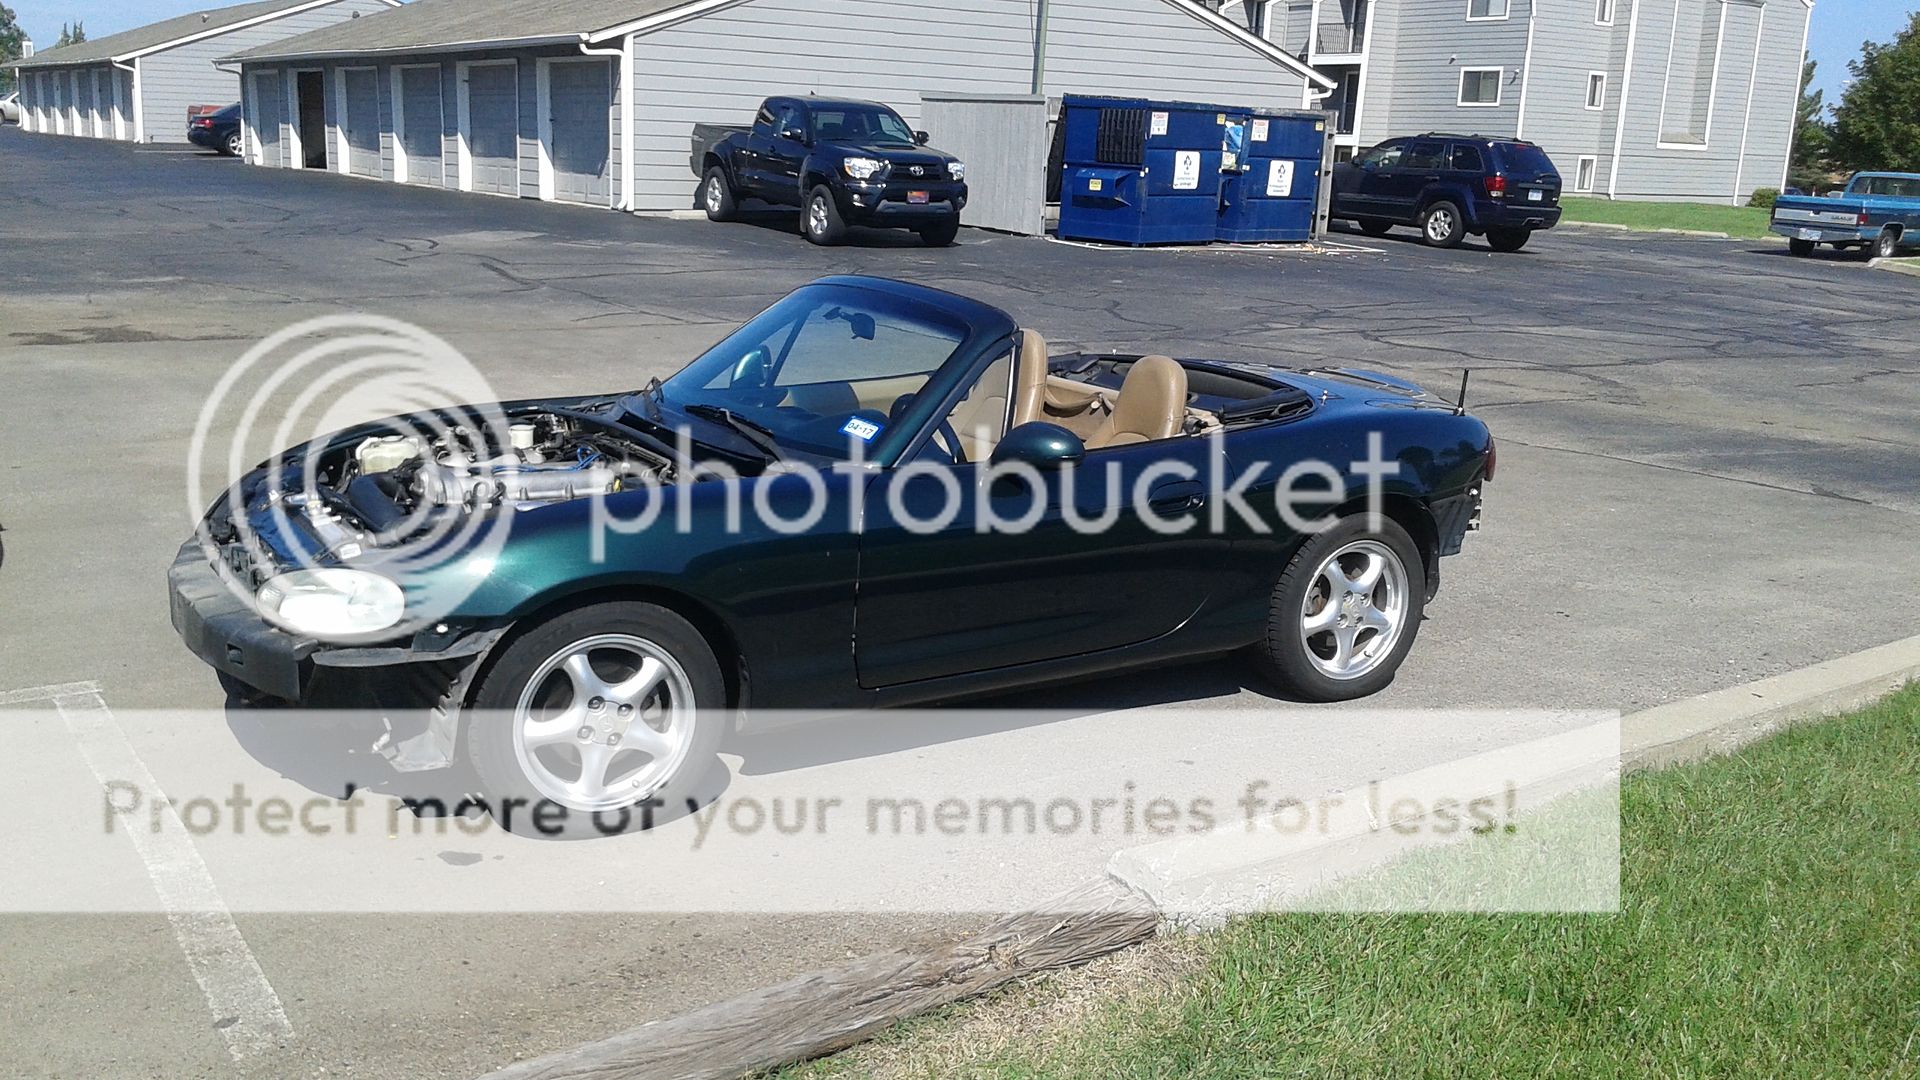
So, while the car was down for the rollbar install, I went ahead and pulled the bumpers, and hood off to give to the guy who had painted my hardtop for me. The plan was to have everything painted and reinstalled before the track day in October.

Needless to say, the car looked a little funny:

Kind Of "Mad Maxish".

The Turtle And The Helmet


 Dropped everything off and waited a few weeks for him to get done. He said that the bumpers had definitely been repainted a few times, but he managed to strip them down completely. Charged me a little more than he quoted, but was happy with the job for the most part.

Except For This..

For some reason, he decided that the metal support plate in the front bumper, needed some Mica loving, so I ended up drilling the pop rivets out and spraying the whole thing with semi gloss black.  Nothing too terrible, just annoying.

He Even Painted The Rubber Seal For The Hood!

I Hate Gold...

Since the emblems had to come off, and I wasn't a fan of them being anodized gold, I shot them with some of the Shadow Cast paint for chrome, and painted them semi gloss black as well.

Put everything back together and it was looking a lot better.

Track Day Ready!

 Now I just need to do something about that dent in the driver's side rear quarter panel.


Alpha, Mike, Foxtrot....

Monday, September 26, 2016

Intake Addendum

Well, I Already Have It..

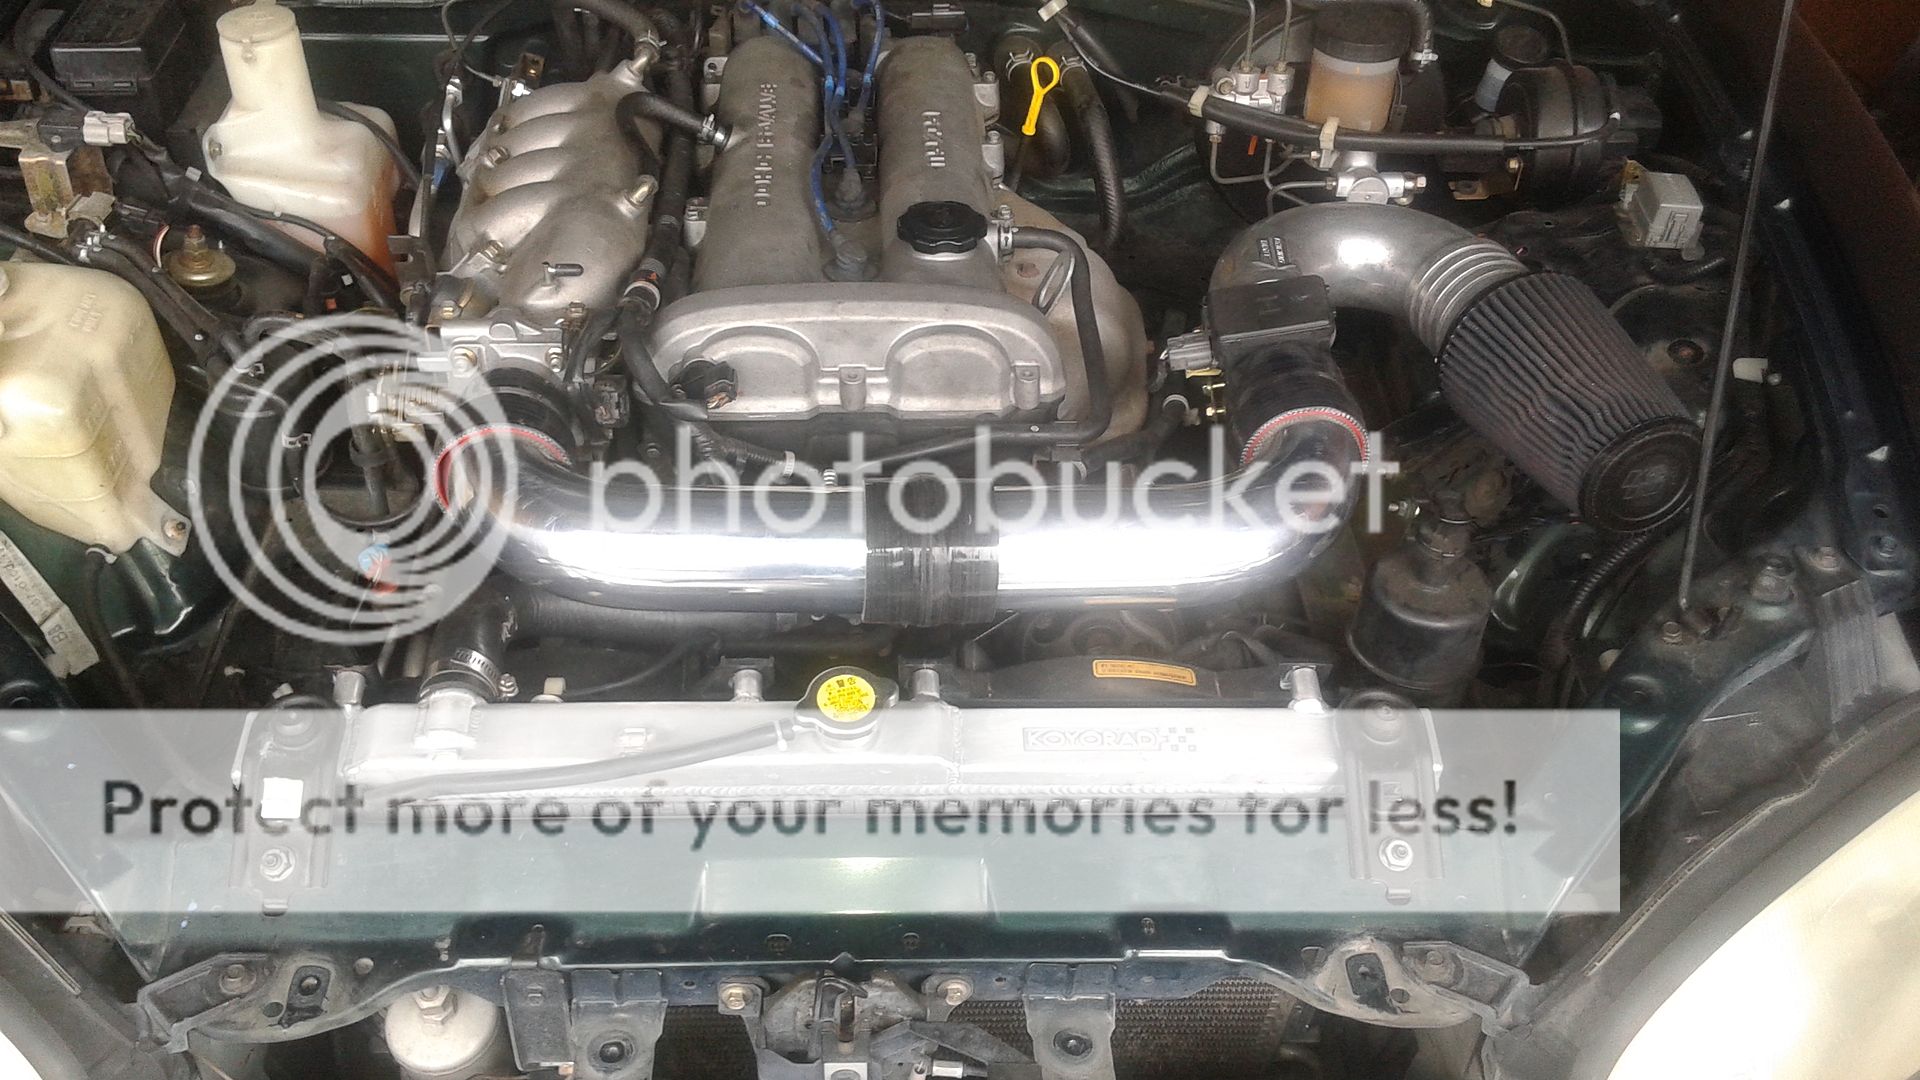
As I mentioned before, I got a "custom" crossover tube with my Racing Beat Intake for my 99 Miata.

I remember taking a look at it when I got it, and a cursory examination revealed it SHOULD work on my car, albeit with some slight modifications.


Why Do This?

The piping used is of a larger diameter than the OEM Plastic Crossover Tube.

Maybe it could act like a Poor Man's ARC Plenum Chamber?  Possibly?   Just Way Cheaper?


Pricey Japanese Parts


Ahhh.....Probably not. 

 I seriously doubt this particular piece will do anything power wise.

It'll probably look very nice, and possibly strand me on the side of the road one night because that's what "custom parts" do.

Screw it.  Let's put it on the car.  I'm tired of tripping over it in the garage.


What Are We Working With Here?

The pipe wasn't really anything special.  Just 2 pieces of polished 3 in diameter piping, with 90 degree bends at each end.  The two pieces were welded together in the center, with beaded edges welded onto the ends of the piping that went into the Throttle Body and MAF Inlet.  There was also a  aluminum nipple welded into the O.D. of the piping for the breather line from the valve cover.

I'm no welder, but the welds didn't look to be done very well.  Better than anything I could do, but not very good in general. Along with the welds, I was also concerned about welding spatter or debris from the installation of the nipple in the pipe.

There were a couple of nice quality 2.75 to 3.0 in silicone couplers included, but no hose clamps.

The previous owner of the intake kit said he had a buddy make the pipe up for him, but never got around to installing it.

OK, I can work with this.


 Let's Make This Work

A quick test fit showed that the overall length of the piping, was a bit too long to fit properly.

Since it was too long, and I wanted to inspect and clean up any possible internal debris that I couldn't view easily, I decided to cut the piping in half.  The cut was made pretty much right in the middle, with a cutoff wheel in a die grinder at first, then finished with a electric jigsaw.

  Knowing that the pipe would have to be cut, I had already ordered a Black 3 in Hump Coupler from Silicone Intakes , to join the two sections together.  The hump coupling would also offer some flexibility in the piping to accommodate engine movement while driving.

I carefully ground down the edges of the cut pieces to allow the pieces to fit between the TB and MAF properly.  This also allowed the hump coupler to fit easier, with the welds on the OD of the piping to act as beaded edges for the coupler and clamps.  The edges were filed to remove any flash, or debris and sanded smooth.

As I suspected, there was some potential debris present from drilling and welding the aluminum nipple in place.  I knocked off the loose metal and welding slag, and hit the area with a file and sandpaper to try and clean it up.

Ran a clean rag through both pieces of piping to clean the ID of the piping of may debris. 

Needs More Hose Clamps
Installed hose clamps on the coupler ends, and tightened everything down.  Hooked up the breather line and started the car.  No issues, appeared to be working well and even seems to clear the hood when closed.


Was It Worth It?

Probably not.  It just looks a lot better than the stock plastic tube, and it probably has no performance benefit whatsoever.  I was just tired of looking at it.

  Hopefully nothing comes loose and leaves me stranded on the side of the road.


I probably should start carrying tools when I drive this car from now on.

Alpha, Mike, Foxtrot...

Friday, September 23, 2016

Blackbird Fabworx Roll Bar Install

Well, It Finally Showed Up

 After about a week and a half after ordering it, my Blackbird Fabworx Single Diagonal Rollbar showed up at my apartment via UPS Ground.

I was expecting it to be delivered to the complex Manager's Office, but instead the driver dropped it off in the hallway in front of my door.
I'm Here!
This meant I got to lug the package back up the stairs and outside to my detached garage.

Fine.  (I can use the exercise.)

So I got the box moved out to the garage and started tearing into it.

Unboxing

The bar was well boxed and protected during shipping.  It took me about 15 minutes to completely extract the bar, and hardware from the box.

Most of this was due to the large amount of packing material, and tape protecting the powdercoated surface of the bar.  It protected everything quite well, just made cutting everything loose "fun".

There's A Roll Bar In There
Once I got it loose and free of the protective materials, I got my first good look at at the bar.

Ooh!!  Pretty Welds!

Nicely Made Mount Plates

Excellent Powder Coat Job
My first impressions of the bar, were that the fans of Blackbird Fab, were right on the money.  Everything was well made, with nice looking welds and a excellent job on the powdercoat.

The hardware kit included 4 backing plates for the mounts on the bar, along with Grade 8 Nuts, Bolts and Washers for the install.  The backing plates were also powder coated and were well machined with rounded edges on the corners.

I consulted the print out of the instructions that Blackbird's owner emailed me when I bought the bar, and did an inventory of all the parts.  Everything was present.  Time to get started.

Let The Slaughter Begin

I did the install pretty much by myself.  Despite what some YouTube "mechanics" might say in their videos, you can in fact do this by yourself.

  It's just a pain in the ass without an extra set of hands, but meh...it can be done.

So, I started by removing everything that was in the way.  I had already pulled the hard top and stored it in my apartment the day before the bar arrived, so it made the interior removal a lot easier.

Before

After

Seats:

First things to go were the seats.  You could do this with them in installed, but it was literally eight 14mm bolts, and took about 3 minutes to pull.  You'll want the extra room this affords.

Rear Carpet:

Removing the rear carpet is a fairly easy process.  I believe there are four 10mm threaded fasteners at the base of the carpet behind the seats, and the rest of the fasteners are plastic carpet trim plugs.  If you can, use the proper tool to remove them, Panel Clip Pliers. If you don't use these, and go after them with a flat head screwdriver, and a pair of needle nose pliers, you WILL BREAK MOST OF THEM.

Like I did.

Luckily, there's place online that sells them in bulk.  25 plugs for about 7 or 8 dollars.  They only come in black, but it beats paying $2 a plug from the dealership.

Parcel Shelf Carpet:

Same thing as before.  Remove the trim plugs and pull the parcel shelf carpet off.  The carpet has a large sound deadening panel glued to it.  I pulled mine off like a dumbass, and had to wrestle with a it a bit when everything went back together.

Trim Pieces:

Remove all the trim pieces on either side of the car.  Most of these parts are snapped in place, and can be removed fairly easily.  Some of them have plastic push rivets and screws holding them in place.  My car came with a factory windblocker, so it had to come out before I could pull all the panels off.  At this point, you should also go ahead and remove the parcel shelf cover.  It's held on with a bunch of 10mm bolts.


Soft Top:

The bar can be installed with the soft top in place, but is MUCH easier to do without the top in place.  There are three 12mm bolts on the inboard side where the top frame bolts to.  There a number of nuts holding 3 U-Shaped brackets under the softop window towards the rear.  These need to come out as well.  Disconnect your defroster harness, and get ready to lift the whole thing out of the car.  This is one of the places where having an extra body would be handy.  The top assembly isn't that heavy, but it is awkward to handle by yourself.

Once that's done, it's time to start making irreversible mods to your car.

Seatbelt Mods:

Unbolt the seatbelt guides and retain the mount bolt.  You'll need it later.  Remove the upper screw/bolt on the seatbelt reel along with the lower.  You'll be reusing the lower bolt, and possibly the upper as well.
Break off the locating tab on the reel to allow the reel to move inboard with the lower bolt attached.  Loosely install the mount bolt on the reels and bring the top end of the reel as far inboard as possible, while allowing the reel to still function.
Mark a hole with a centerpunch and drill a hole that allows a bolt to hold the reel in this position.
For my car, I had to scrounge in my bolt bin to find two appropriate metal self tapping screws to do the job.
Remove the lower mounting bolts once the seatbelt reels are in place.


Cutting/Trimming:

Now you need to start making some cuts, to allow the rear legs of the bar to clear the parcel shelf.
At this point you have two choices.  You can remove the minimum amount of metal to allow the bar to clear, and maintain a neat appearance or you can cut more metal out and have an easier time with drilling the holes for the rear mount feet.  Your choice.

I placed the bar in the car temporarily, which was another point where someone to help, would have been great.  With the bar in place, I "eyeballed" where I thought the rear bar would pass and estimated how far back.  In the interest of making it look as neat as possible, I cut both sides with approximately the same dimensions, and tried to follow the contour of the metal when possible.

Rough Estimate

Cut Too Far Back

Same Here, But It Made It Easier To Drill The Holes For The Mount Plates

Bar Set In Car

See?  Cut It Too Far Back.


I had to make a few adjustments on my initial cuts, but it didn't turn out too bad.  I used a electric die grinder with a cutoff wheel for the majority of the cuts.  The rest were made with a hacksaw and a electric jigsaw.  Once I had my final cuts made, I dressed the sharp edges of the cuts with a mill and bastard file.  I also tried to use a half round file to radius the sharp corners of my cuts.

I also placed the Parcel Shelf cover back on and trimmed it as well with the same tools.  The edges were also dressed and radiused as best as possible with the files.

The cut edges of the Parcel Shelf in the were masked off and had POR-15 applied to the exposed edges of metal, to try and prevent rust from forming.  I also hit the areas where the rear mount feet would be bolted to the car.

Grey POR-15

Hopefully No Rust

Drilling:

At this point it's time to place the bar in the car and start drilling holes for the mount plates.
Got the bar back in and used the lower seatbelt reel bolts to "lock" the bar in place to start drilling the holes needed.
The clearance from the side of the bar to the old seatbelt tower was very tight, so I used two pieces of cardboard stuffed between the bar and  seatbelt tower to center the bar before I tightened down the lower seatbelt reel bolts.
Ensure that all wiring on the front mount pads are inboard of the main hoop, and outboard at the rear pad.  I didn't do this and it bit me in the butt later on.
Using a centerpunch, I marked the center of the bolt holes for the front and rear mount plates.  The rear mount pads under the parcel shelf already lined up (mostly) with existing holes in the body, so two mount bolts were dropped in place to try and keep everything centered.  The holes for the rear pads are kind of difficult to access easily, so it might be easier to get at them from the bottom of the car.
Drilled the marked holes in the front pads with a smaller pilot bit, then went to the final size.  I hit the freshly drilled areas with POR-15.

To get at the rear to drill the holes required, you need to jack the rear end of the car up, remove both rear wheels and pull the wheelwell splash guards.
Using the rear backing plate as a template, I got the holes marked with a center punch and drilled my pilot holes.  Depending on the position, it might be easier to drill from the bottom or the top.  Once the final holes were drilled with the right sized drill bit, more POR-15 was applied to the holes.

Mounting:

Per the instructions, I applied a generous amount of RTV to the mount plates where the holes were drilled and through the holes themselves before tightening everything down.
During the final tightening process, I also kept the doors of the car closed to make sure nothing was not aligned when the bar was tightened down.
Once it was tightened down at all 4 mount points, I reinstalled the rear wheel well splashguards and wheels to put the car back on the ground.
Note Where The Wiring Is.  That's Not Correct.

Bolted Down With Black RTV

Bolted In!

Trimmed Parcel Shelf Cover


 Finishing Up:

The Seatbelt Guide gets relocated to tabs welded onto the rollbar.  The original bolt that mounted the guide to the car, will get cut down and reinstalled on the tabs on both sides of the car.

The trim pieces will need to be reinstalled after being cut and modified to fit.  Blackbird provides a diagram that shows where to cut, and it's fairly simple to do.  Just take your time.
Trimmed Pieces

Side Trim


Remember the wiring on the Driver's Side near the front mount plate?  Turns out in order for the trim panel to fit properly, it needs to go behind the main hoop and not in front of it. Since the connector is rather large, and I wasn't about to unbolt the rollbar again, I had to de-pin the connector and route the wiring properly.
Incorrect Routing

Corrected Routing


 After that, it's merely putting everything back together.  Trim pieces, soft top, seats and all the other stuff that got taken off.


Conclusion

I still haven't driven the car with the rollbar installed, because I've got the bumpers and hood off to get repainted.  But, I can already tell it's made a difference to the integrity of the car.

My D/S Door has always been hard to close, requiring a very firm "slam" to get it to shut. It now requires far less force to close properly.   Which isn't conclusive evidence to be sure, but I'm sure once I drive it, I'll be able to tell.

I still need to install the SFI Padding and figure out some way to cover it for street driving.

The bar is very close to my head, and buying a set of seats to get me lower in the car may have just taken precedence if I'm gonna drive this thing on the street.

Overall, it wasn't that hard and I'm pretty pleased with the result, even if I wish I had done a few things differently.

I'll get it right on the next one.

Alpha, Mike, Foxtrot.....

Saturday, September 17, 2016

The Turtle Gets Shelled

Soft Tops...Bah! 

Some people buy a Miata specifically because you can easily drop the top for the open air driving experience.  I'm one of the few Miata owners who could actually care less about it being a convertible, and actually see the Soft Top as kind of a hindrance for the car.

As a convertible, the Miata chassis is kind of "sloppy."  With about 3/4's of the roof structure being replaced with a metal frame and a canvas or vinyl covering, the factory Soft Top offers little in the area of protection from thieves or support to the car.  Also at highway speeds, the wind noise can be quite irritating as well.

I bought the car to enhance it's performance and occasionally "drive it in anger" on the track but it's a street car for the most part.  A Hard Top would serve to help stiffen the car up a bit, offer better protection from the elements, make it more pleasant to drive and look a lot better.

I wanted to retain the Soft Top in case I ever needed to pull the Hard Top off, or got a wild hair and wanted to take it out as a convertible.  So, I decided to keep an eye out for a Hard Top while the car was off the road to fix the Oil Pan .

Hello Craigslist My Old Friend..

Surprisingly, I was able to find a hardtop available in the local area off of Craigslist. It was located about 3miles from my apartment and I headed over to check it out, before it got snagged up by someone else.

  It was a OEM Mazda hard top from a early Miata, so it didn't have a defroster.  It wasn't perfect, with some slight damage to the edges in some spot with faded red paint.  I made an offer and the seller accepted.  He helped me load it into the Raider, and I was off with my new prize.
Lucky Find


I still needed the side striker plates to completely mount the hardtop, so I placed an order for them from a dealership online.  The car had a set of "Frankenstein Bolts" from a previous hard top install, so I was able to throw it on the car and see what it looked like.


Red And Green...Not A Good Combination


Two Things That Don't Go Great Together

Obviously, the Green/Red combo was, pretty garish.  A buddy at work told me he had a friend who could paint the top for me at a decent price, and repair the damage to the edges.  I drove the car out to his place, and left the top with him for a few weeks.  It took awhile because he was doing it as a favor, and for FAR less than what a few shops in the area wanted to charge.

Take your time man, I can wait.

Meanwhile, Back At The Ranch

With the hardtop off, I could deal with a few other things that needed to be taken care of.  One of the "Frankenstein Bolts" was loose, the power antenna had gotten bent due to a mishap with my garage door and the Bose Head Unit needed to be replaced.

Revenge Of Frankenstein

The loose "Frankenstein Bolt" was due to a broken captured nut on the driver's side.  The bolt wasn't threaded in fully and was spinning in place.  Using a ratchet and universal joint on a socket, I was able to hold the nut in place and unscrew the bolt.  Easy.

The passenger side?  Not so easy.  The bolt seized up on the stud, and after a fight was removed.  The stud seized in the nut and was pretty much destroyed in the process of removal.  I wound up breaking the captured nut under the bolt, and everything dropped free.  Not my proudest moment, but it worked.
Screw You.  I Win.


I ordered a replacement set of bolts, and while I waited for them to arrive, I took the opportunity to paint the trim plates under the bolts with special tinted paint designed to smoke chrome trim and wheels.  The effect I got was a kind of "Piano Black" which was far more attractive than the anodized Gold finish that it came with.

After the new bolts and studs arrived, I bought a set of nuts with the proper thread and installed everything, in preparation for the repainted hardtop.


Radio Ga Ga

Took care of a few other things while the hardtop was being painted.  I installed a JVC Bluetooth head unit to replace the factory BOSE unit that came with the car.  I used a Scosche C4MA02 to convert the speaker level output of the aftermarket head unit to a line level signal that the factory BOSE amplifier could use.

Since my Miata only uses two speakers, I also de-pinned a unused lead from the adapter to act as a 12V trigger wire for the factory amplifier.  This wire was soldered to the 12V power antenna wire coming off the aftermarket head unit harness and was placed in the Scosche adapter plug to mate up with the Light Green Wire with a Black Stripe on the factory radio plug.  This is the trigger wire for the factory amp.  With this setup, your power antenna and the Bose amplifier should switch on whenever you power the head unit up.

Full details are available at this link:  Bose Amp/Aftermarket Head Unit

Of course, I did all this work before I destroyed the power antenna mast backing out of the garage with the door partially down.

Figures.

Since a broken power antenna mast is no bueno, I replaced the base with a new non power assembly.  To clean up the look a bit, I installed a shorty aluminum mast and painted the trim ring for the base to give it a piano black look as well. The radio reception isn't the greatest, but I rarely listen to the radio anyway, relying on Pandora, CD's or music on a USB drive.

It's Done!

Got a call, saying the hardtop was ready.  Drove the Miata to pick it up and pay the guy.  I think he did a good job.  And for a LOT less than what I was quoted at a body shop.
Is This The Same Top?

Shiny Top, Dirty Car
I was pretty pleased with the work, and talked to him about doing the hood and bumpers for me as well, in a few weeks.  I couldn't believe it was the same top.  I was so stoked, I decided to wash the car and snap another picture of the car.
 
Squeaky Clean

The car is a lot more civilized to drive now.  Much quieter at highway speeds, looks a ton better and feels much more secure with an actual structural piece tying the vehicle structure together.

Now If I Could Just Get It To Stop Leaking When I Wash It...

Alpha, Mike, Foxtrot.....