Showing posts with label 98 Talon TSi/AWD- Rusty Venture. Show all posts

Sunday, August 19, 2018

Sayonara, Rusty!!

He Don't Live Here Anymore..

Have You Seen Me?

Unfortunately, I chose to give up on resurrecting "Rusty", my 98 Eagle Talon TSi/AWD.

"Why", you ask?  "Why would you do that"?  Especially after all this time, money and effort spent trying to unf**k the horrors and neglect heaped upon this car, by previous owners?  

Because something, shinier and newer caught my eye?

Well...sort of.

No, Seriously..

A chance glance at my Facebook Timeline showed an ad for a car that I've been after for a very long time.  I'm talking over 15 years of time.  So after about 10 seconds of.."No, I really shouldn't", gave way to, "Oh, What The Hell!  Why Not?", the decision was made.

I wanted to keep the car, and finish what I started, but I don't have the room for three "toy" cars.  One of them has to go and unfortunately, the one that wasn't currently running and also needed the most money would be the one to go.

Such, High Hopes...

The whole point of this car was to build a nice, clean, lightly modded unique and rare AWD car that I could take on cruises, long road trips and show up to car meets in and not have something that looked like it had escaped from a junkyard.

This car could be that car, but it would require a ton of money, time and effort to get it there.  I wanted to be the one to save this car, from the neglect and abuse from previous owners, but it just didn't make sense, financially.

The car I was going to replace it with was all of those things and more.  Rare, AWD, Turbocharged, with working Cruise, A/C and pretty much bone stock.

For the price of getting the 98 Talon back on the road and looking decent, I could buy this new car, park it in the garage and have a running and driving car that just needed some minimal cleanup.  

As opposed to one that needed pretty much a full on "Unf**kening."

Crap. 

 Sorry Dude, but I gotta vote you out of the garage.

Fire Sale!

In order to clear the garage as quickly as possible, I priced "Rusty" and pretty much anything I had gathered, scavenged, bought, and traded for the car into a pile and basically said,

 "Come And Get It!"


A friend of a friend was looking for a new project car, to replace one he had to sell because of some financial issues from last year. 

  After some consideration,  a deal was struck and the new owner of "Rusty" arrived a week later with a Roll Back Trailer and took everything pictured with him.  

Except for the wheels and tires.  Those belong to "Trogdor."

I Kept The Wheels

Hopes, Dreams?

I certainly do hope that the new owner gets the car back on the road.  Although, I have a feeling that the chances are more than likely pretty low. 

Most Project Cars occupy a strange sort of "Limbo" where they don't truly exist as cars anymore. They get passed from owner to owner and either wind up resurrected to prowl the streets once again, parted out or get turned into beer cans.  

New owners often have the best of intentions, but their plans are usually poorly executed, or they wind up running into financial or time issues and can't see things through.

After failing this car myself, I think it deserves a chance to live again.

I'm pulling for you "Rusty"!


Alpha, Mike, Foxtrot....

Sunday, March 18, 2018

Put The Spray Can Down...

Good Intentions, Poor Results

Tinted Taillights on certain cars is never a sure thing.

When properly executed, some cars look great with them and some, just don't.

Even if a car manages to pull off the "look" with a set of Tinted Taillights, they do need to be maintained.
Ugh
Over the years with out regular care, or the occasional touch up, your "Sick Ass" Taillights, just start looking like...Ass.

Sadly, I Think It Looks Better Now
Which is what I think happened to my 98 Talon. 

I'm not sure what happened here, but as you can see...she hasn't aged well.  Both taillights are dull, faded and very dirty.  The same thing goes for the Center Trim Bezel.  Not sure why the center wasn't tinted, but it looks tired too.

Like the Rear End of "Trogdor", my other Talon, these things need a refresh.  Badly.

Almost Like The Last Time

The big difference between the 98 and the 93 Taillights though, is the presence of the Tint itself on the taillights.  This would need to be removed before any real work could start on anything.
Sexy


Bath Time

Again, the Taillights and Center Bezel were cleaned off in the Bathtub.  Being an apartment dweller, unfortunately it's my only option.

  Any loose dirt, or debris were carefully removed from the various assemblies.  Once done washing, the pieces were dried off to prepare for the next step.

Un-Tint Your Ride

The Center Trim Bezel was disassembled and prepped for refinishing.
Easier To Tear Down Than The 93 Bezel

The surface of both Taillights was carefully wetsanded with 800 Grit Sandpaper to remove the old coating used to tint the lights.

Unfortunately some of the raised lettering molded on the surface of the lights was sanded smooth to ensure all of the coating was removed.

Once this was done, the Taillights and the Center Trim Bezel were then Wetsanded further with 1000, 1500, 2000 and finally 2500 Grit Sandpaper.

A Little Polish

The Center Trim Bezel unfortunately had quite a bit of "crazing" present under the Reflective Lens due to age or exposure to the elements.  Polishing and Wetsanding the Bezel can't do anything to hide this, but it will still make the entire assembly look a lot better.
Crazed

The Taillights were Polished using a Headlight Refinishing Kit from Mother's.  The Polishing Ball was installed on a Cordless Drill and Both Taillights were polished.
Much Better


The Center Trim Bezel was also Polished using the kit.  The large Black Plastic section was also Wetsanded and Polished as well.

Painting

The Center Trim Bezel had raised letters spelling "TALON" on the Upper Panel.  These needed to be masked off and painted.  

The area was carefully masked off with Painter's Tape and a Razor Knife.  3 Coats of Semi Gloss Black were applied, with two coats of Matte Clear.
"Carefully"

Meh.  It Worked
After drying, the raised Letters were Wetsanded to remove large defects on the paint, and then polished with the Cordless Drill and Polish from the Headlight Restoration Kit.


The Black Panel Hasn't Been Polished Yet

All Together Now

As you can see, the Rear End Looks a lot better now.
Getting There

Still Missing Something

Forced Performance And Texas...Represent!!

Thank God, That's Over

Seeing the car look better, with some small changes is keeping me motivated.  This thing is a huge mess right now, and at times it feels a little overwhelming.  I've resurrected plenty of 1G DSM's before, but the 2G is uncharted territory.

One step at a time.

Alpha, Mike, Foxtrot...

Sunday, February 25, 2018

Even More 98 Talon Interior Antics-Part 1

Looks Like Butt

The weather has been pretty crappy the last couple of days, so I decided to try and get a little more stuff done to the interior of the 98, because...Lord.  It needs help.
Dumpster Fire, 1 Each

Embrace The Horror


Previously I had gone through some of the wiring and had generally "unfu**ed" a lot of things and cobbled together one "good" center console out of two other consoles.

Today I decided to tackle some items that would have more of a visual impact towards getting this thing, looking like a car again.

Ejecto Seato, Cuz..

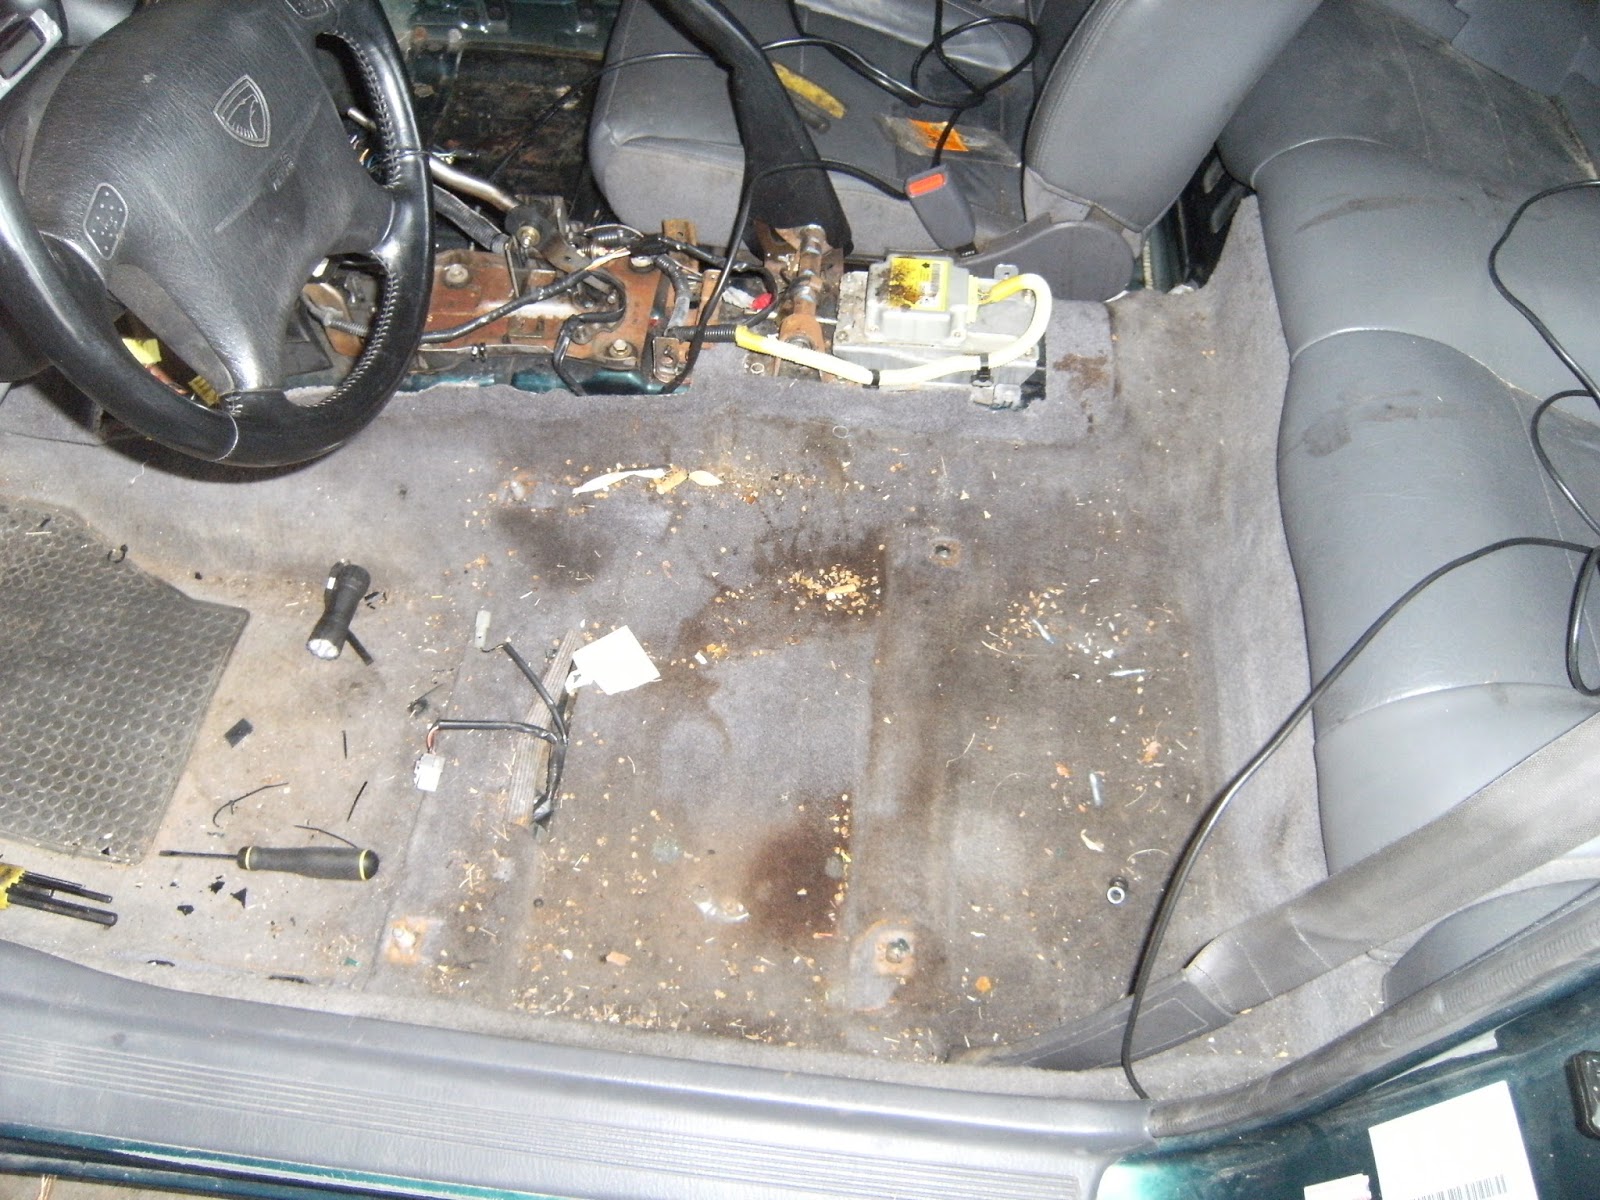
The previous owner had removed the part of the carpet on the Passenger Side of the car for some reason, and left a bit of a mess with some spilled oil as well.

I had sourced a used replacement carpet from someone parting their car out, and with the interior mostly torn apart, it seemed like a good time to install this stuff.

 First step, remove the seats.  Which would be easy enough if the Driver's Seat wasn't a Power Seat, and I had a Battery in the car.

The Factory Service Manual outlined a procedure for removing the Drive Motor for the Power Seat from the rails, which would allow you to manually move the seat back and forth to access the mounting fasteners.

The Drive Mounts are located under the front of the Driver's Seat and consist of two small 4 mm Allen Head Bolts on the Feft and Right Hand side of the seat.  Remove the bolts and you can now pop the ends of the Drive Motor off of the splined shafts that allow the Seat to move on the rails.  You can now move the seat Fore and Aft to access the 14 mm nuts and bolts securing the seat to the floor of the car.  The Passenger Side Seat is a conventional seat and can be easily removed by loosening the same fasteners on the Passenger Side.
Yeah, That's Kind Of Gross

Wall To Wall Carpeting

With the seats out, removing the carpet is fairly easy.  

The Sill Plates on the Driver and Passenger sides are pressed into place with snap clips for retention.  Simply pry up carefully, and the snap clips should release.

The Lever Arms for the Hatch Release and Fuel Door Release are on the Driver's Side.  Two Phillips Head Screws hold the plastic Trim Cover in place, and this piece needs to be removed.

The Dead Pedal on the Driver's Side need to come out.  On my car there was only one bolt holding it in place under one of two Trim Covers on the Dead Pedal.  Once cover can be unscrewed  and the other one pops out with a small Flat Tip Screwdriver.  A 10 mm Bolt holds the pedal in place.

The bottom bolts of the Front Seat Belts needs to be removed from the lower Door Sill on both sides of the car.  A 19 mm Socket will do the job. 

The rear of the carpet goes under the Rear Seat Cushion and loops around the latched the hold the Rear Seat Bottom in place.  On some cars there may be various other Clips or Fasteners that need to be removed before the Carpet can come out.

Once the old remnants of the original Carpet were removed, the replacement carpet was laid down and tucked into place.  The Carpet goes under the lower B-Pilla Trim Pieces, so some slight disassembly may be required.  Once everything is tucked into place, go ahead reinstall everything that was removed previously.

Whoops...Forgot Something

Since I planned on using the Factory Amplifier for the Stereo System in the car, I needed to reinstall the Amp before the Passenger Seat went into the car. 

The Amp is mounted to a Bracket that slides into two preformed slots under the Passenger Seat along with two Phillips Head Screws.  The Wiring for the Amp pokes through the carpet, and plugs into the side of the Amp.
Wooh...Infinity Sound.


Now the stupid Seats can go back in.

All Done

A quick vacuum on the Carpet and Seats, and it looks a ton better.  My Center Console is ready to go in, just waiting for the paint to dry on a part.  
Seats Need Cleaning

I Can't Wait For This Thing To Run Again
It's finally starting to look like a car again.


Alpha, Mike, Foxtrot.....


Saturday, February 24, 2018

Center Console Boogaloo

Interior Work Begins 


The Talon has a two tone Grey and Black interior, which I'm pretty happy with.  Plus the power Leather Driver's Seat is something I've never had...wait, except for my old 05 Pontiac GTO.  That had Power...Everything!  Anyway.....

The Grey/Black interior is much better than the all Grey or Black and Tan interior that some 95-99 Eclipses and Talons got saddled with.  

However, it's but definitely not as cool as the all Black interior some 99 Eclipse's got.  I think the 99 OZ Rally Edition Eclipse was the only model that featured a factory "Black" interior, but I could be wrong.  Turns out it wasn't all Black, but had Black Door Panels and Inserts.

Some owners modified their interiors by painting them Black.  Some of them actually turned out pretty good. 

99 Mitsubishi Eclipse O.Z. Rally Edition

OEM 99 O.Z. Rally Edition Interior.  Not Completely Black From The Factory

Modified Interior With Painted Pieces


 I'd love to have something that in this car.  Actually, I would really love to have this car running and driving, so I guess my dream interior can wait....for now.

Anyway, my car came with some black interior pieces, to include the Center Console. 

Which was in pretty good shape, except for one..two, tiny little things.  Perfect, except for the 1.5 in Analog Water Temperature Gauge SOMEONE decided to install in front of the shifter.  Oh and there was a hole drilled for the LED used for the alarm I pulled out in my last post. 
This Is Why I Hate People

Fantastic.

The Gauge "Install" ruined what was otherwise a good condition Black Center Console, and it made the Gauge almost impossible to see while driving.  

Try looking past your shifter, at a small needle on a cheap 1.5 inch "Wal-Mart Special" Water Temp Gauge while driving.  

Sounds like a great way to drift into a telephone pole at night

I thought about installing a small Digital Voltmeter Gauge in place of the Water Temp Gauge, but decided to just replace the ruined Center Console with another non "Swiss Cheese" part.

Hunting High And Low

  It turns out, trying to find a decent 2G DSM Black Center Console in Wichita, is kind of hard.  I struck out at the ONE Pick and Pull type junkyard here in town.  Actually, I did find one but someone decided to break it in half while removing something else, instead of pulling it off clean.  The only other 2G in the yard, had a Grey Center Console, which was in perfect shape.  Of course.

  Tried hitting up local DSM Groups on Facebook, with no luck.  Struck out on finding one on Craigslist or car-part.com as well.

You're My Only Hope...Sort Of

I decided to hit up Performance Partout for the part. Great guys and easy to deal with, even if they do the Devil's Work.

Performance Partout is a business in New Jersey that buys DSM's, Galant VR-4's and other Import Cars specifically to part them out.  I hate that complete and mostly running cars get bought specifically to get stripped and then crushed, but there is a demand for parts, and these guys fill that void. So to speak. 

Some cars are wrecks,  complete "Basket Cases" or "Rust Buckets" that would probably never see the road again. 

 Stripping these cars help keep the "Good Ones" on the road.  Right?

Again, I know logically that there's a need for this to happen to these cars.  The company is only filling a vital need for DSM Owners all over the world.  I couldn't find the parts locally, and they had what I needed.  

I will definitely need to use them again in the future.

It doesn't mean I have to like it.

It's Here...

My Center Console arrived after a small delay.  It turns out that they had a problem finding a  Black 2G Center Console as well.  Go figure.  

For Your Protection

It Made It Safely

It wasn't perfect, but it didn't have a small hole carved out of it in front of the Shifter, so I wasn't too worried.  

These cars are OLD now, and the plastics from that era haven't really stood up too well over the years.  This is in NO WAY a complaint about the part that I received.    

The few things I spotted could be fixed, or swapped with parts from the other console.  Just a little bit of work.

Cracked

The first thing I noticed was one of the Mount Points for the Console was cracked.  I hit the cracks with some gel type Super Glue to try and draw the pieces back together.

Kind Of Glued Together


After the glue had time to set, I spread a thin layer of Automotive Goop on the bottom of the mounting point.  The Goop hardens into a tough, temperature resistant and flexible coating which is very useful in fixing all sorts of broken things on cars.  I've used this product many times, and it will help hold the glued pieces together once the console is installed.

Gooped!


Put The Tools Down

The next thing to tackle was the Storage Bin under the Arm Rest for the Center Console.  The Previous Owner had evidently attacked the bottom and the sides of the Storage Bin with what looks like a Hot Knife and carved a hole into the Bottom and the Sides of the Bin.  Probably to install an Aftermarket Component of some kind.
Yup...Still Hate People


Probably, after realizing how STUPID this looked,it was "fixed". A small piece of Contact Paper was cut to fit to the bottom of the Bin to keep items from falling through the hole and under the Console, I assume.

Luckily the Bin in question just snaps into place, and was quickly swapped out after thoroughly cleaning the one that hadn't been attacked by a Hot Knife.
No Holes

Armrest Bingo

The original padded Arm Rest that came with my car had a broken Latch, but an intact Storage Pocket under the lid.  The new Arm Rest had a functioning Latch, but no Storage Pocket Lid.

Since the new Arm Rest was in better shape, both of them were disassembled and the parts swapped to make one GOOD  Arm Rest for the Center Console.
Switcheroo!

Clean Up

The Center Console, Cup Holder, Ash Tray and Shift Boot were cleaned up to get rid of the years of accumulated dirt, junk and other garbage present.

The Cup Holders, Ash Trays and Storage Bins were placed in the sink and soaked in hot water with dish soap.  They were rinsed,  wiped down with paper towels, dried and cleaned with Armor All Cleaning Wipes.  

The Shift Boot was removed and wiped down with a damp paper towel, and then cleaned with the same Armor All Cleaning Wipes.  

The Cigarette Lighter assemblies were removed from both Center Consoles and showed signs of corrosion and flaking paint under the metal trim rings.  These Rings pressed into the plastic Center Console pieces popped out fairly easily with a Flat Tip Screwdriver.  Both of these pieces will be repainted before re-installing the Console into the car.
Needs Paint

Reassembly

It's Done

"Cup Holder" Lol

Once everything was cleaned up, the parts were swapped onto their respective consoles.

The "Good" Console will go into the car once everything in the interior is finished.  I still need to pull both seats out and install the spare set of carpet that I have.

  The "Bad" Console will stick around for awhile, at least until the other one is installed in the car.

Unfortunately, I've learned that it's sometimes better to keep stuff around..."Just In Case."

I swear that's just not my "Inner Packrat" talking.

Damnit.


Alpha, Mike, Foxtrot...


Sunday, February 18, 2018

Well, It's A Start- 98 Eagle Talon TSi/AWD

Basket Case, 1 Each

I finally got a chance to go outside and do a little more work on the 98 Talon TSi/AWD I picked up a few months ago.  Actual work, besides going out there to look at the car, wonder how I'm going to do this and then beating my head against a wall.

I'm still not 100% recovered from my shoulder surgery, so I can't really get after it like I want to.  However at this point any progress made towards getting the car going again, is a GOOD thing.

As mentioned before, it's a real "Basket Case" and if it wasn't a really rare 98 AWD Talon, I probably would have run screaming from it.  Maybe I should have.

"This Thing Needs A Lot Of Work."


The Day It Arrived

Interior Shenaningans

"I'm A Mechanic, Not An Electrician"  Well Actually...

How Does Something Like This Even Happen?

A Little Primer And A Little Paint...Make It What She Ain't"

Missing Side Strakes/Door Guard Pieces?  Figures.
The car is missing the engine, and as you can see the interior really needs some help.  

The engine bay has been partially disassembled and is pretty filthy. 

 A lot of parts were haphazardly removed and/or stored in one of the plastic tubs I got with the car.  Some stuff is flat out missing or unaccounted for.

It's also dinged, dented, missing some trim pieces and rusty in some spots.  It also looks like it's an AWD without Limited Slip.  Bummer.

Hey, let's find the shittiest 2Gb Talon AWD in Kansas and try to save it!

At Least It Was Cheap. Sorta...

Silver Lining?

While this thing is indeed a true "Basket Case", it did come with some stuff that kind of took the sting out a bit.

  •  2G 7 Bolt 2.3l Longblock Assembly- with Eagle Rods, Wiseco Pistons, 100mm Factory Crank, Split Thrust Bearing Block (Assembled By The Previous Owner)
  • Spare 2G 7 Bolt Split Thrust Bearing Block, Stock Crank, 7 Bolt Rods/Pistons
  • 2 Black Box Flashable 2G ECU's
  • 97 AWD Transmission/Transfer Case
  • "Custom" FMIC Setup With Piping
  • MAF Translator With 2 Spare 3in GM MAF's
  • AEM 52mm Wideband Gauge/ProSport Boost Gauge
  • Spare Parts To Include: Clutches, Flywheels, E-Bay Turbos, E-Bay Tubular Manifold, a Greddy Adjustable Cam Gear And Other Random BS.

Some of these items have already been sold or traded off.  I have a pretty clear idea of how I want this thing to be built.

First Things First

The easiest thing to tackle first would be the interior and the wiring,

I knew this car had probably passed through a lot of hands the chances for all sorts of wiring fuckery were high, and I was right. 

 I find it's often easier when dealing with a new to you project car, to just got through the wiring and remove any thing that looks sketchy or questionable.  Which in this case was pretty much..everything.

Gauges

The car came with two 52mm Gauges on the A-Pillar in a Gauge Pod.  The fact that the Gauge Pod was secured to the A-Pillar with two big Wood Screws should have been my first clue that maybe someone before me should have put down the tools and walked away.

You Gonna Learn...
The two gauges were a AEM Wideband Gauge, with a blue bezel?  Alright, I guess.  Also in the pod was a ProSport Mechanical Boost Gauge.

The wiring for the gauges was jammed between the dash and the A-Pillar and consisted of speaker wire in some places, with the bare wire ends twisted together.  At least they used electrical tape. 

The bezel on the AEM Wideband was painted with blue paint.  Well, that's one mystery solved.


Gauges were removed and the wiring that was still usable was also removed for possible future use in the car.  

Radio Ga Ga

The car came with a Factory Amplified Stereo System, that was bypassed by the previous owner.  I found the Factory Amp in one of the bins that came with the car, and plan on using it if possible.

The Factory Amp mounts underneath the passenger seat and is often bypassed when it stops working, "Becasue Racecar" or if the owner wants to put a better Amplifier and  Speaker setup in the car.

I found the remnants a of a Amplifer and Subwoofer install in the rear hatch, so I imagine the PO bypassed it for this reason.  Unfortunately, instead of using a Adapter Harness to wire his new Head Unit into the car, he cut the Factory Radio Plug off and hardwired his new harness in place.

"Way To Go, Genius..."

I wonder why he did this as the Adapter Harnesses to work with the Factory Amp or bypassing it isn't that expensive.  It was probably harder and more time consuming to figure out how to cludge his new plug into the factory wiring.   

Whatever.  I wasn't there, I just have to fix his "modification."


Using a plug from a junkyard car, I went ahead and resoldered the Factory Radio Plug back into place.  Luckily, the wiring for the Factory Amp  was still intact and hadn't been removed.  Hopefully the old Amp still works.  I plan on installing a Double DIN Touchscreen like the one in my old VW Golf TDI and utilizing the Factor Amp to power everything.
In Progress
Finished

 Turbo Time...Err, What's All This?

I saw that the HKS Turbo Timer on top of the steering column wasn't secured very well and I wanted to verify that someone hadn't hardwired the Turbo Timer into the Starter Circuit, so I dropped the Driver's Side Under Dash Panel.  

This revealed that not only was the Turbo Timer properly installed, but that something else was present.  A partially installed Matrix 10.5  Clifford Alarm System.

The Alarm Control Box had been removed previously, but all the wiring and relays from the previous install were still in place.

I carefully removed everything, and had to reconnect a lead on the Ignition Switch that had been split for the Starter Kill function.  I also removed a set of relays that had been spliced in to the Turbo Timer harness to allow the Turbo Timer to function with the Alarm.

At Least It Came Out Easily


I'm sure that the car started just fine with the Alarm Control Box removed, but I'd rather not deal with having to work around the wiring in the future.  There's still a Coaxial Cable of some kind that runs to the rear of the car.  I still need to trace that and see what it goes to.  

The HKS Turbo Timer has a some features that require additional wires to be run to it from the Parking Brake and the vehicle's ECU.  These wires were routed and installed, with the underdash cover reinstalled as well.

Translation...Not Needed

The car came with a MAF Translator, which I had never used before.  

I planned on using a 2G MAF on the car, so I started trying to figure out how to remove it from the car.

The install looked...ODD, because I thought these units were designed to be installed in the engine bay or relocated with a adapter harness inside the car. 

Mine was completely covered in electrical tape and went through a hole drilled through the firewall (Really?)

Turns out the previous owner extended the connectors with what looks like electrical cable for a house?

What. The. Actual. Fawk?

I went ahead and cut the wires off to remove the Translator from the car and carefully verified the wiring schematic and resoldered the connectors back onto the Translator.  Who knows?  I might actually need this someday.  Just wish there was some way to test it out.  Who knows what it's been through.

More To Come

The interior is still in need of work.  The Previous Owner liked to drill into panels and installed a small gauge in the Center Console, so there are several panels and components that need to be replaced.

The carpet needs to be replaced, and there's a large oil spill behind the Passenger Seat that needs to be cleaned up as well.  No idea how that happened.  The Driver's Seat is a power adjustable unit, so I have to disconnect the motor to pull the seat out without a battery in the car.  I already have a replacement carpet set, so once I can wrestle the seat out, that'll get done.

Not a lot done....but it's a start.

Until Then,

Alpha, Mike, Foxtrot....