
Well, I Already Have It..
As I mentioned before, I got a "custom" crossover tube with my Racing Beat Intake for my 99 Miata.I remember taking a look at it when I got it, and a cursory examination revealed it SHOULD work on my car, albeit with some slight modifications.
Why Do This?
The piping used is of a larger diameter than the OEM Plastic Crossover Tube.Maybe it could act like a Poor Man's ARC Plenum Chamber? Possibly? Just Way Cheaper?
 | |
| Pricey Japanese Parts |
Ahhh.....Probably not.
I seriously doubt this particular piece will do anything power wise.
It'll probably look very nice, and possibly strand me on the side of the road one night because that's what "custom parts" do.
Screw it. Let's put it on the car. I'm tired of tripping over it in the garage.
What Are We Working With Here?
The pipe wasn't really anything special. Just 2 pieces of polished 3 in diameter piping, with 90 degree bends at each end. The two pieces were welded together in the center, with beaded edges welded onto the ends of the piping that went into the Throttle Body and MAF Inlet. There was also a aluminum nipple welded into the O.D. of the piping for the breather line from the valve cover.I'm no welder, but the welds didn't look to be done very well. Better than anything I could do, but not very good in general. Along with the welds, I was also concerned about welding spatter or debris from the installation of the nipple in the pipe.
There were a couple of nice quality 2.75 to 3.0 in silicone couplers included, but no hose clamps.
The previous owner of the intake kit said he had a buddy make the pipe up for him, but never got around to installing it.
OK, I can work with this.
Let's Make This Work
A quick test fit showed that the overall length of the piping, was a bit too long to fit properly.Since it was too long, and I wanted to inspect and clean up any possible internal debris that I couldn't view easily, I decided to cut the piping in half. The cut was made pretty much right in the middle, with a cutoff wheel in a die grinder at first, then finished with a electric jigsaw.
Knowing that the pipe would have to be cut, I had already ordered a Black 3 in Hump Coupler from Silicone Intakes , to join the two sections together. The hump coupling would also offer some flexibility in the piping to accommodate engine movement while driving.
I carefully ground down the edges of the cut pieces to allow the pieces to fit between the TB and MAF properly. This also allowed the hump coupler to fit easier, with the welds on the OD of the piping to act as beaded edges for the coupler and clamps. The edges were filed to remove any flash, or debris and sanded smooth.
As I suspected, there was some potential debris present from drilling and welding the aluminum nipple in place. I knocked off the loose metal and welding slag, and hit the area with a file and sandpaper to try and clean it up.
Ran a clean rag through both pieces of piping to clean the ID of the piping of may debris.
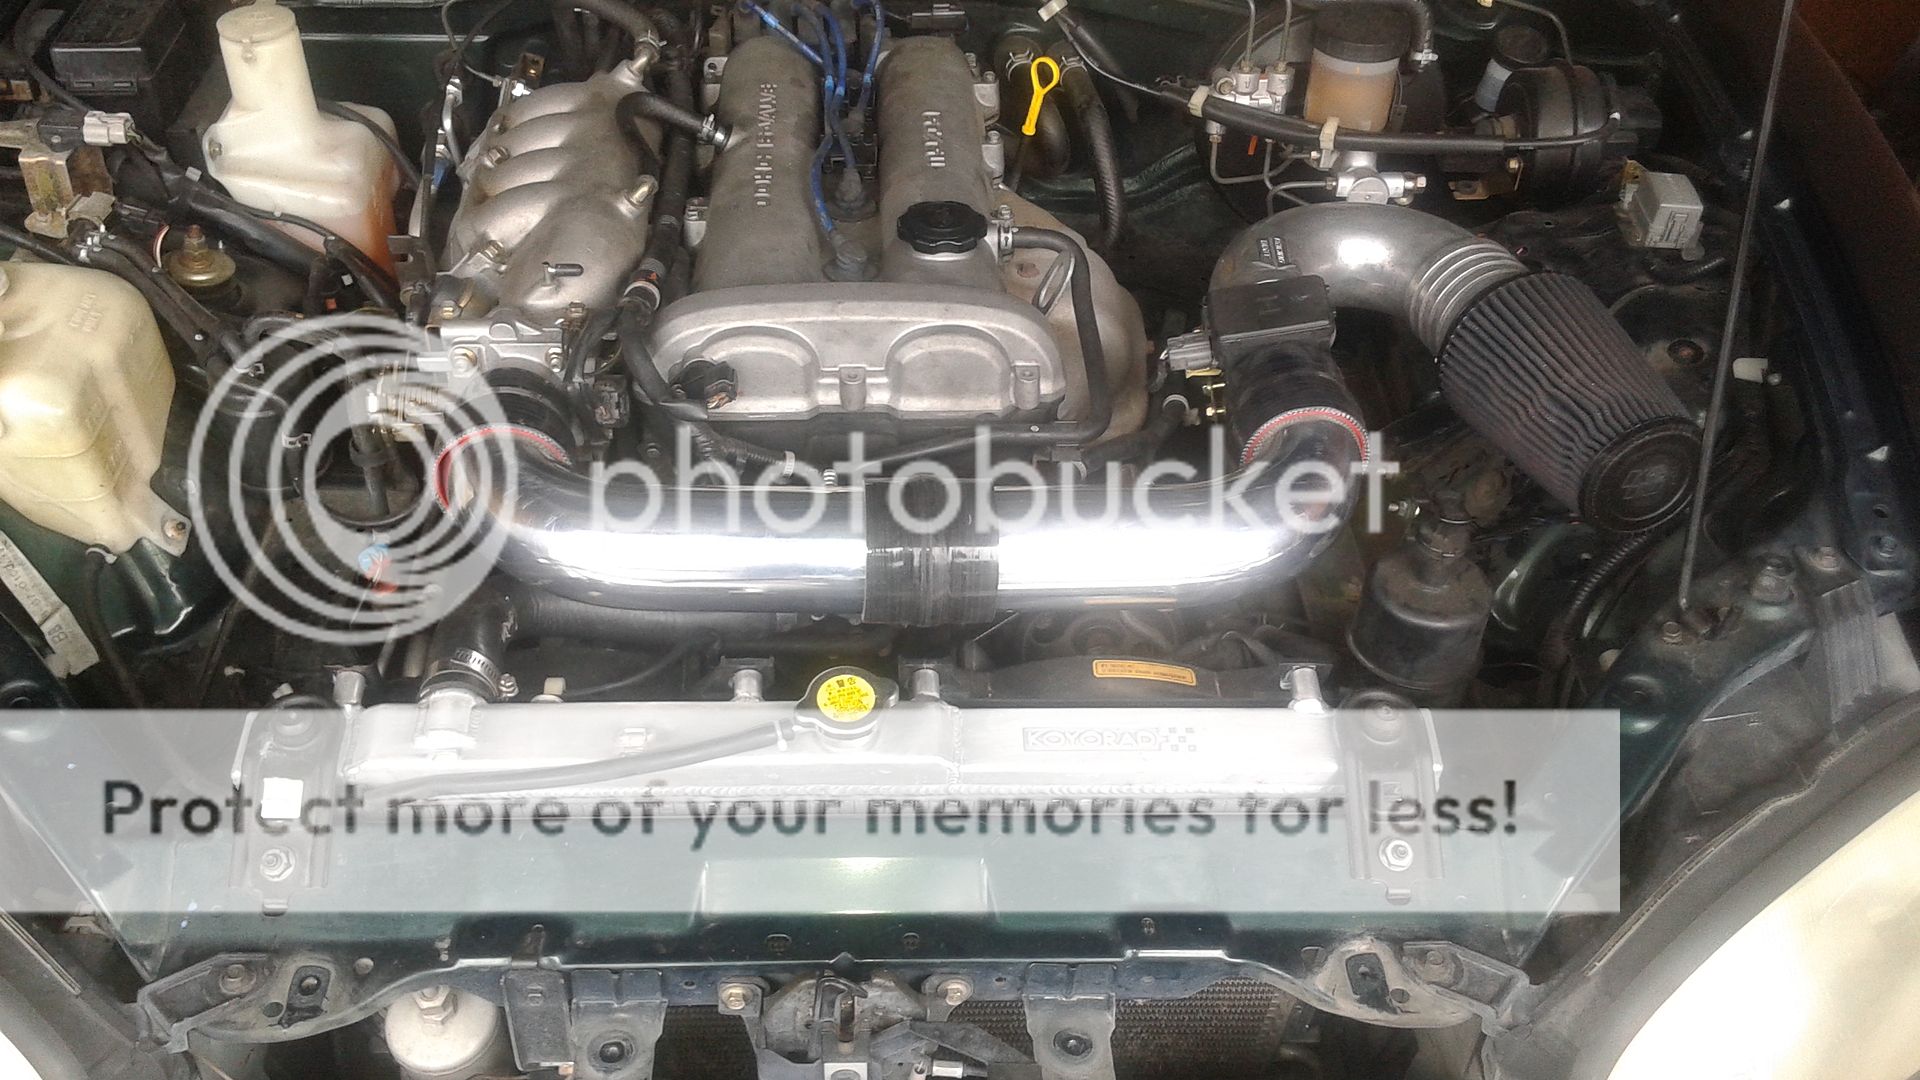 |
| Needs More Hose Clamps |
Was It Worth It?
Probably not. It just looks a lot better than the stock plastic tube, and it probably has no performance benefit whatsoever. I was just tired of looking at it.Hopefully nothing comes loose and leaves me stranded on the side of the road.
I probably should start carrying tools when I drive this car from now on.
Alpha, Mike, Foxtrot...
No comments:
Post a Comment